Monday, December 13, 2010

Crafty Fun for the Holidays

Here are some of my favorite craft ideas from Martha Stewart.  Many of these crafts can be made with your little kiddos.

Holly Napkin Holders


Pinecone Elves


Baby Sock Advent Calendar


Cookie Gift Tags

Sunday, December 12, 2010

Glorified "Leftovers"

Do you often find recipes make too much food for you (and your friends/family) to consume in one sitting?

Or do you find that when you buy certain food (like celery, greens, tomatoes, potatoes, buttermilk, cream, etc.) and they go bad before you have time to use them or you simply have too much for your needs?

Leftovers?? If you are like me, you'll probably make a face at the sound of those words.  I am just not a huge fan of leftovers... especially if it is more than one day old. But, leftovers fit really nicely into my budget. 

So, I am learning to be creative with food and create different recipes using similar ingredients or learning how to spice up leftovers to make them more appealing. 

What Do I Do With Leftover Ingredients?
This website is great because you can enter up to three ingredients, it searches its database, and returns recipes that match those ingredients.

How Can I Make Leftovers Better?
Here are some ideas to revamping your leftovers:

1. Create a salad- Use taco meat and other fixings to create a taco salad. Or use your left-over BBQ chicken to create a BBQ chicken salad.

2. Spice it up with rice- I will put all kinds of things over rice: BBQ chicken, meatballs, creamy chicken, veggies, sausage, etc.

3. Make a sandwich or a wrap- Leftover meatloaf... no problem.  It makes a really tasty sandwich the next day.  Leftover turkey or chicken... perfect! Throw it into a tortilla... and make a yummy wrap. 

4. Leftover bread/buns- Use bread or buns to make garlic bread for the next meal.  Or if your bread is a little dry, make some delicious french toast (dry bread works great!)

I love these two websites. They show you just what to do with leftovers like chicken, beef, veggies, steak, etc.

Wednesday, December 1, 2010

Gift Idea for Friends and Neighbors

'Tis the season to be jolly... and to be stressed about finding the perfect gift.  Here is my solution for gifts for friends, family, neighbors, teachers, etc.  

Make them goody trays! 

Almost everyone loves goodies (especially during the holidays)... and there are so many great recipes out there with very few ingredients.  They are fairly inexpensive to create as well.  

Be sure to include a wide variety of treats (sweet and savory). 

Here is a list of items I have used for others:
  • Chex mix
  • Muddy Buddies (Chex)
  • Caramel Chex
  • Rice Krispy Treats (You can shape them into fun wintery shapes, or add a stick to the middle and make a Rice Krispy Pop)
  • Homemade caramels (YUM!)- A little goes a long way with these
  • Chocolate dipped prezels
  • Homemade peppermint bark
  • Assorted winter fruits (pears, oranges, etc)
  • Nuts
And I just made two treats to bring to work this morning and they were FANTASTIC.  They both came from the Taste of Home Best Loved Cookies and Candies 2010 Magazine.  Everyone at work was raving about them... so I thought I would share.  They are incredibly simple to make.

Cookie Dough Truffles (adapted from Lanita Dedon)
http://www.tasteofhome.com/recipes/Cookie-Dough-Truffles (I had to make a few minor adjustments from the original)
Makes around 5 dozen
  • 1/2 c butter, softened
  • 3/4 c packed brown sugar
  • 1 tsp vanilla extract
  • 2 1/4 c flour
  • 1 can (14 oz) sweetened condensed milk
  • 1 c miniature semisweet chocolate chips
  • 1 to 1 1/2 pound of chocolate candy coating
  1. In a large bowl, cream the butter and brown sugar.  Beat in vanilla.  Slowly, alternate adding condensed milk and flour, beating after each addition.  Sire in chocolate chips.  
  2. Chill dough for about 15-20 minutes.  Shape into 1 inch balls; place on waxed paper on a cookie sheet.  Loosely cover and refrigerate for 1 1/2 hours. 
  3. Melt chocolate according to directions on package.  Dip chilled balls in chocolate.  Allow excess to drip off.  Place back on waxed paper.  Refrigerate until firm (about 10-15 minutes).  If desired, drizzle additional chocolate or white chocolate on top.  Store in refrigerator. 
Mint and Chocolate Fudge Candies (adapted from Candy Clarke)
http://www.tasteofhome.com/recipes/Peppermint-Candy (Recipe changed slightly from original)
Makes about 5 dozen
  • 1 cup semisweet chocolate chips
  • 1 can (14 oz) sweetened condensed milk, divided
  • 1 cup vanilla or white baking chips
  • 1 tsp peppermint extract
  • 2-3 drops of green food coloring
  1. In a small saucepan over low heat, melt chocolate chips with 3/4 cup of condensed milk.  Stir often.  Line an 8-inch square dish with buttered wax paper.
  2. Spread the chocolate mixture over the bottom of the dish.  Chill for 10 minutes.  
  3. In another saucepan, melt vanilla chips and remaining cup condensed milk over low heat until smooth.  Remove from heat and add peppermint extract and food coloring. Pour over the layer of chocolate in the dish and smooth out.  Refrigerate until firm.
  4. Cut into 1-inch square pieces.  Store in airtight container in refrigerator. 
** Add red food coloring and crushed peppermint candy cane to top layer for a festive look.  

Sunday, November 14, 2010

Easy as Pumpkin Pie: Decorating on a Dime for Thanksgiving

Isn't fall great? The chill in the air and the beautiful fall colors.  It's just a great time of the year.  Well, I found some beautiful, simple, and CHEAP decorating ideas for your Thanksgiving feast.


1. Mini-Pumpkin Placeholders:
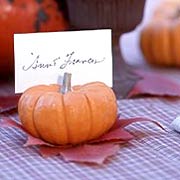
Using a mini-pumpkin, cut a small slit on the top and insert your name card on top.  Incredibly easy.  Incredibly festive.  To see pictures, click on the link below.
(This idea came from P. Allen Smith from his appearance on the TODAY show- http://www.pallensmith.com/articles/nbc-today-show-appearance-fall-tablescapes)


2. Raffia:
This can be purchased at a craft store  and makes anything look fall-ish.  Tie it around a pumpkin, a vase, a wreath, rolled napkins, etc.  It adds a nice fall touch to something you might already have around your house. 
3. Foliage:
Go out for a walk around the neighborhood looking for beautiful red and orange leaves (or go to the craft store for a garland of silk leaves).
4. Pumpkins of different colors:
Dress up a table by adding pumpkins of different colors in a basket, on a plate, or in a large bowl.


Martha Stewart has some fantastic and GORGEOUS table settings and decorations for fall festivities.  Check them out and see if you can modify them to fit your budget.
http://www.marthastewart.com/photogallery/fall-centerpieces
http://www.marthastewart.com/photogallery/thanksgiving-table-settings

Wednesday, October 27, 2010

Books, Books, Books!

For as long as I can remember, I have always loved books.  When I was in elementary school, I longed for the days when the teacher would hand out the monthly Book Order packet so I could scan for the latest and greatest.  I still love books.  I walk into book stores and salivate over all the books with their freshly glued bindings and creaseless pages (ok, maybe that is a bit extreme... but you get the point).  

My love for the Harry Potter series has become quite an obsession... especially because the newest movie is coming out in a few weeks. In order to prepare myself for the movie, I have been listening to Harry Potter books on CDs during my 40 minute commute to work each day.  We checked them out from the local library and they keep me quite entertained at NO COST AT ALL! Libraries are absolutely wonderful but don't get enough credit. 

Reading books can even be a fun family event or great date.  Last weekend, my husband and I went to Barnes and Noble to just peruse and do something we don't normally do.  The great thing about these big book stores is that there is SOMETHING for everyone... magazines, kids books, how-to books, history, and the list goes on and on!

I feel like I experience somewhat of a "sticker shock" when I look to see how much some of these books cost.  I found this great book on how to use this computer program I love (Dreamweaver, in case you were wondering) and the book was nearly $50... not quite in my budget... for a BOOK!

But, I found an used older edition online at Amazon.com for $3.99.  Great deal! 

So lessons to be learned... 

1. Going to Barnes and Noble is a fun (and cheap) date or family outing!
2. Don't ever buy books for the full sticker price... check out used books online or shop the clearance aisles in bookstores.  If you shop at Borders or on borders.com, sign up for their weekly email.  They often offer a discount coupon on a weekly basis.  F.Y.I.- When looking at textbooks online, the prices tend to increase at the beginning of each semester... if you can hold off, wait until a couple weeks into the semester. 
3. Use the library! It's even cheaper than Amazon... it's free!

Saturday, October 23, 2010

Budgeting 101

Budgeting is a skill that everyone needs to learn... young and old, rich and poor.  It is the key to successfully living within your means.  And in the current financial strain many of us find ourselves, budgeting is more than important; it is essential for survival and keeping oneself out of debt.

Why budget? Budgeting helps people stay on track, spending less than they make.  It can help one spend and save better.  It can be eye-opening to see how much money is being spent at fast food restaurants and how much can be saved from eating left-overs one night.  

Many have systems that work for them and I have a system I have been using for years now and I love it.  I am going to share one of my deepest financial secrets because it might just help someone out there.

This is all you need:
- Budgeting spreadsheet (This is the one I use: https://spreadsheets.google.com/ccc?key=0AvyVgg-3I2uXdEZSMlY5ZmZGMDF3RURudzd3RmZFaVE&hl=en&authkey=CNKXp6EP)  Fancy software is great but when you are tight for cash, this totally does the trick.

That's it! (That's the easy part)

Here are the steps to filling out a budget planner. Using the sheet from the link provided above, fill in any cell that is yellow or gray.  DO NOT EDIT THE GREEN BOXES (those auto-calculate!). 

1. Start with the estimated income.  How much do you think you will make this month?  Shoot low and if you make more, great! If you estimate low, you know you will be able to cover everything on the budget and you may have some money left over.  Add any other sources of income. 

2. Optional: You can fill out your withholdings.  I like to keep track of them otherwise you would just fill in your net income (the amount you take home on the check) and skip this part.

3. Next, fill out your fixed payments and finance payments (loans, rent, etc.).  You know exactly what to put there because the payment never changes.  Gather up some old utility bills and estimate the cost of utilities per month.  Budget for telephone, gas, electric, water, internet, cable, etc. (I lump most of my utilities together.)

4. Variable expenses: This is where you have some room.  You can adjust these as you look at your income versus expense to see how much money you have available.  On the bottom of the workbook, you will see other tabs "Auto", "Groceries", "Food", "Entertain", and "Gifts".  When I am entering my actual expenses, I use these sheets to keep track of each purchase.  Just remember, do not edit the green cells.  They calculate themselves. 

I set a calendar notification on my computer for the first Saturday of each month to remind me that this is my day to review my previous month's budget and start my new monthly budget. 

The review is essential as it will help inform you on your next month's budget.  As I look at last month's budget, I make sure everything was either "under budget" or "on budget".  If I was "over budget", I make sure I know the reason why (and it better be more than "because I wanted it") and find another category to cut from to ensure I can cover the "over budget" item.  I look for trends from month to month and adjust my budget as I see fit. 

It's always rewarding to come in "under budget".  You can take that extra money and add it to your savings for a rainy day. 

I know this was a VERY brief explanation of how I budget... if you would like more details or help creating a budget, please contact me.  I would love to help... I am a numbers girl.  This stuff is actually fun to me.
Saturday, October 16, 2010

Pumpkin Waffles and Buttermilk Syrup

I first tasted these delectable fall treats at a little fall party hosted by friend Megan.  This recipe comes from the Food Network with the exception of a few changes I made. The original recipe is found here.  It's pretty easy to make... and easily makes smiles on all who eat it. 


Ingredients

Waffles:

  • 1 cup flour
  • 1/4 cup wheat germ
  • 1/3 cup granulated sugar
  • 1 tablespoon baking powder
  • 1 teaspoon pumpkin pie spice
  • 1/2 teaspoon freshly grated nutmeg
  • 1/2 teaspoon fine salt
  • 3/4 cup milk
  • 1/2 cup pumpkin puree
  • 1/4 cup melted butter
  • 1/4 cup melted shortening (transfat-free)
  • 1 large egg
  • 1 large egg white

Topping:

  • 2 to 3 tablespoons unsalted butter
  • crisp apples, peeled and sliced thinly
  • a sprinkle of cinnamon
Buttermilk Syrup:
1 1/2 cups white sugar
3/4 cup buttermilk
1/2 cup butter
1 teaspoon baking soda
2 teaspoons vanilla extract

Directions

For the waffles: 
Preheat a waffle iron to medium heat.
Whisk the flour, wheat germ, sugar, baking powder, spice and salt together in a large bowl.
Beat together the milk, pumpkin, melted butter, and melted shortening, egg and egg white, in a large measuring cup. Make a well in the center of the dry ingredients and pour in the wet ingredients. Whisk together to make a slightly lumpy batter.
For the topping: Melt the butter in a skillet over medium heat. Add the apples and let cook until slightly browned, but still crisp, about 4 minutes. 
For the buttermilk syrup: Put white sugar, buttermilk, butter, and baking soda in a saucepan.  Cook on medium-high heat for about 5 minutes.  Remove from heat and stir in vanilla. 
Pour and spread about 1 cup batter into the waffle iron. Cover and cook until crisp and a rich golden brown, about 7 minutes.  
Serve hot with the apples and buttermilk syrup.

Monday, October 11, 2010

Chicken Pot Pie

This recipe is my own version of a recipe found here: http://allrecipes.com//Recipe/chicken-pot-pie-ix/Detail.aspx  
With a handful of changes, this Chicken Pot Pie is a sure crowd pleaser!!


Chicken Pot Pie
Right out of the oven
Ingredients
  • 1 pound skinless, boneless chicken breast halves - Shredded
  • Vegetables: The recipe calls for 1 cup sliced carrots, 1 cup frozen green peas, 1/2 cup sliced celery but my husband doesn’t really dig vegetables.  I used 1 cup of frozen vegetables and a can of whole potatoes (I would have used fresh potatoes if I had them)
  • 1/3 cup butter
  • 1/3 cup chopped onion
  • 1/3 cup all-purpose flour
  • 1/2 teaspoon salt
  • 1/4 teaspoon black pepper
  • 1/4 teaspoon celery seed (don’t skip this… great flavor!)
  • 1 3/4 cups chicken broth (I used 1 ¾ cups water and 2 chicken bouillon cubes)
  • a bit of poultry seasoning (I used Montreal Chicken seasoning)
  • a bit of garlic powder
  • 2/3 cup milk 
  • 2 (9 inch) unbaked pie crusts (I used Walmart Great Value – frozen crusts)
  • 1 egg white 
Directions
1.  I used a crock pot to cook my chicken and veggies.  It makes for more tender chicken. Cook chicken, chicken broth, garlic powder, and poultry seasoning in crockpot for at least 5 hours on low.
2.  After 5 hours, shred chicken.  Throw veggies in the crockpot with chicken for about 15 minutes on high.
3.  Preheat oven to 350 degrees.
4.  In the saucepan over medium heat, cook onions in butter until soft and translucent. Drain chicken broth from chicken and veggies into a bowl to use later- don’t get rid of broth. 
5.  Stir in flour, salt, pepper, and celery seed to the onions/butter mixture. Slowly stir in chicken broth and milk. Simmer over medium-low heat until thick. Remove from heat and set aside.
6.  Brush the bottom crust with egg whites and bake at 350 degrees for 5 minutes. 
7.  Place the chicken/veggies mixure in bottom pie crust. Pour hot liquid mixture over. Cover with top crust, seal edges, and cut away excess dough. Make several small slits in the top to allow steam to escape.  Brush with egg whites.
8.  Bake in the preheated oven for 40 to 45 minutes, or until pastry is golden brown and filling is bubbly. Cool for 10 minutes before serving.

Budget Tip #1: Meal Planning

Our grocery budget for the month is $300.  That's it.  It comes out to about $10/day for meals for the both of us.  Not very much but we manage.  We try at least once a week to find a recipe that will last 2 days.

My first (and probably my most important tip) is:

PLAN FOR YOUR MEALS AHEAD OF TIME

Designate one day of the week to do all your shopping and planning for your meals.  I chose Saturday because that's when I know me and my husband will both be home.  We sit down and plan out our dinners for the week.  We start by writing down on paper each day of the upcoming week (see below) and assigning a meal to each day.  From time to time, I change which meal I make for which day, but I this just gives me a rough estimate of the meals I need to make.  

Example: 
Sunday- Pot Roast
Monday- Pot Roast leftovers
Tuesday- Baked Chicken
Wednesday- Grilled Cheese Sandwiches
Thursday- Philly Cheesesteaks
Friday- Eggs Rolls and Fried Rice
Saturday- Philly Cheesesteaks

Once you have your meals mapped out, post your meals on the fridge (or another highly noticeable area) and MAKE A LIST of things you need at the store! Write down all the ingredients that you need, plus everything else you may need for that week for breakfast and lunch.  Go through your house to see if you need milk, eggs, cheese, butter, fruit, etc.  

I write down everything I am buying at the store.  This eliminates those impulse buys or anything you don't really need.  Honestly, this keeps me so close to my budget because I know what I can spend and I don't veer from it.   On occasion, I see something that I forgot to write down that I need for a meal, but if it isn't on my meal list or isn't something I need for breakfast or lunches, I DON'T buy it.  

Any don't plan your meals WHILE shopping. That's when you get "emotional buying"- buying according to what emotion you are feeling at the time.  (If I did this, I would buy the entire store... I love food!) You tend to overbuy... no bueno! 

Well, that's my first tip. It takes some getting used to, but after a few weeks, you will develop a habit of doing this.  (Plus, it eliminates all those last-minute grocery trips--- yuck!) Try it this week and see if it works for you. 

Why the blog?

I came up with this idea for the blog because I always see my friends (and I've done it too) post their favorite recipes or deals they score on their personal blogs.  I didn't want to clutter my personal blog with all those things, hence this blog. 

Anyway. I was fortunate enough to get married this year. Wait... don't stop reading! Getting married brought a set of challenges I didn't anticipate.  Last year, I was working as a teacher on full salary making just over $40,000 a year (with benefits).  Because of the economy, I am a part-time sub making $85/day at a job 40 miles away from my house.  That's quite an income reduction... and it is really hard living on so little...

But, it can be done! And it is rewarding each month when we come under budget! It's almost like a competition to see how little we can spend... yet still have fun.

I've had to change my ways over the last few months to accomodate our measly little earnings but I wanted to use this blog as a platform to share my tips... just in case I can help someone else out.  I am going to share my budget tips, shopping tips, and recipes I use (only the good ones)... and anything else I see fitting! 

I welcome any comments or suggestions.  Hope you enjoy!